
Time:2025.11.06Browse:1
1. Core Electrical Inspection Labeling Scenarios
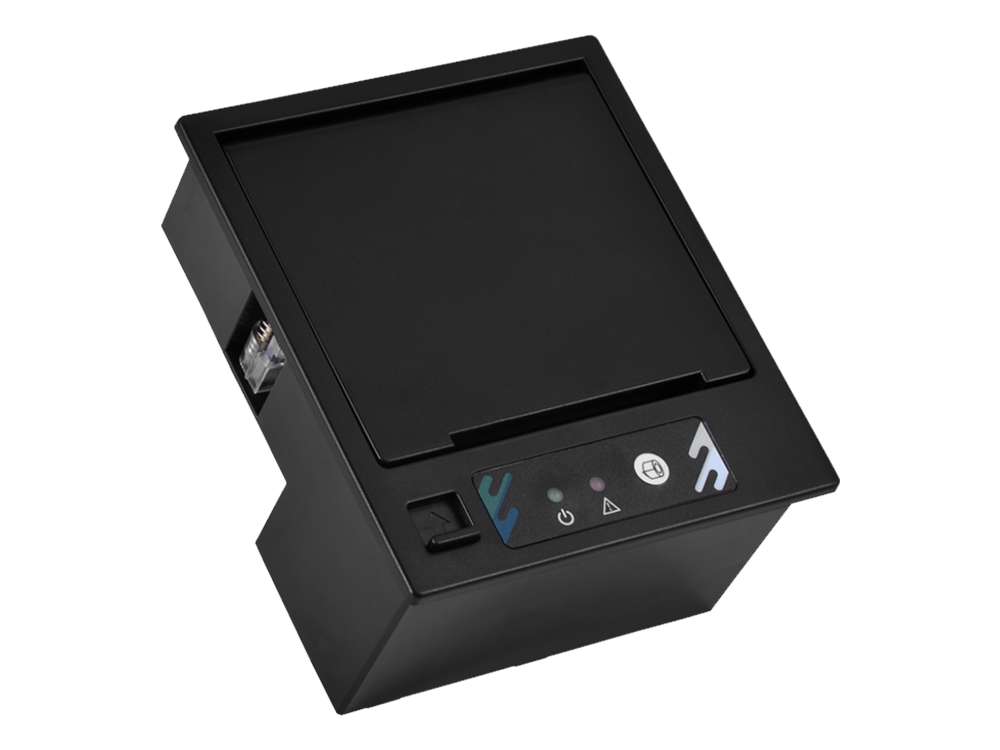
A battery-powered thermal printer is an essential tool for electrical maintenance and inspection, designed to print durable, data-rich labels for electrical equipment (e.g., circuit breakers, motors, wiring harnesses, transformers) on-the-go. It addresses key electrical industry challenges like equipment misidentification, incomplete inspection records, and label degradation in harsh environments (high temperature, oil, vibration), while enabling real-time linkage to inspection management systems. Key scenarios include:
1.1 Industrial Equipment Electrical Patrol Inspection
Typical Use Case: Labeling factory electrical assets (e.g., 3-phase motors, PLC panels, conveyor belt drives) post-inspection to document status (e.g., "passed insulation test," "needs bearing replacement").
Operational Logic: Inspectors use a mobile inspection app to log equipment ID, test data (e.g., insulation resistance: 500MΩ, voltage: 480V), and defects; the printer connects via anti-interference Bluetooth (resistant to electromagnetic fields from motors), generating a label with QR code (linked to full inspection report), inspection date, inspector ID, and next inspection window (e.g., "recheck in 3 months"). Labels are applied to equipment housings (away from heat sinks).
Key Advantage: Eliminates paper-based inspection logs (prone to loss); ensures inspectors and maintenance teams access real-time asset status—critical for preventing unplanned downtime.
1.2 Building Electrical System Acceptance Labeling
Typical Setup: Labeling newly installed or renovated building electrical components (e.g., circuit breaker boxes, emergency lighting, HVAC electrical connections) during code compliance acceptance testing (e.g., to NFPA 70/NEC standards).
Operational Flow: Electricians test components (e.g., ground fault circuit interrupter (GFCI) trip time, wire gauge verification); input test results into a code-compliance app; the printer outputs labels with "approved for use" status, installation date, electrician license number, and code reference (e.g., "NFPA 70 Art. 210"). Labels use fire-retardant material (compliant with building fire codes).
Key Advantage: Streamlines local authority inspections; provides permanent proof of compliance—avoids costly rework due to missing or incorrect documentation.
1.3 Appliance/Device Electrical Repair Labeling
Typical Use Case: Labeling repaired household or commercial appliances (e.g., refrigerators, industrial microwaves, power tools) to document electrical safety checks (e.g., "cord insulation tested," "ground continuity verified").
Operational Logic: Repair technicians use a mobile app to log repair details (e.g., "replaced damaged power cord," "tested at 120V"); the printer generates a label with repair date, technician ID, warranty period (e.g., "90-day repair warranty"), and safety warning (e.g., "do not use with extension cords >25ft"). Labels are applied to appliance nameplates or non-heated surfaces.
Key Advantage: Builds customer trust; ensures compliance with consumer safety standards (e.g., UL 60335 for household appliances) and reduces liability for repair businesses.
1.4 High-Voltage Power Infrastructure Labeling
Typical Use Case: Labeling high-voltage (HV) components (e.g., transformers, switchgear, power cables) during field inspections (e.g., utility company grid maintenance) to mark inspection status and hazard levels.
Operational Logic: HV inspectors (in PPE) use a ruggedized tablet to log HV test data (e.g., transformer oil dielectric strength: 30kV); the printer (mounted on an insulated cart) prints labels with HV warning symbols (e.g., " Danger - 13.8kV "), inspection date, and restricted access note (e.g., "authorized personnel only"). Labels are weather-resistant (UV/rainproof) for outdoor use.
Key Advantage: Enhances field safety; ensures HV assets are clearly marked with inspection history—critical for preventing electrical accidents during maintenance.
2. Critical Technical Specifications for Electrical Inspection Use
Electrical inspection labels demand durability, resistance to electrical environments, and data integrity—prioritize these specifications:
Battery Performance: Rechargeable lithium-ion battery (5,000–7,000 mAh) with 14–18 hours of continuous printing (≈1,500–2,000 labels)—enough for full-day industrial/site inspections. Supports USB-C fast charging (2-hour full charge) via insulated power banks (compliant with IEC 61557 for electrical safety testing). Low-battery alert (≤20% charge) via LED and silent app notification (avoids distracting inspectors in noisy industrial settings).
Printing Parameters: 50–80mm adjustable label width (50mm for small components like terminal blocks, 80mm for HV transformers); 300 DPI resolution (ensures QR codes/barcodes are scannable even with minor oil/dust buildup). Print speed of 75–95mm/s—prints an inspection label in 1.5–2 seconds (critical for high-volume factory patrol inspections).
Durability & Environmental Resistance: IP67 rating (resists dust, oil splashes, and temporary water immersion—common in factories, construction sites, and outdoor power infrastructure). Operating temperature range of -20℃~80℃ (withstands HV transformer heat and cold outdoor inspections). Drop resistance of 2m (survives falls from inspection ladders or industrial workbenches).
Label Material Compatibility: Works with electrical-grade thermal labels:
Heat-resistant polyester (up to 150℃, for motor housings or transformer surfaces).
Oil/chemical-resistant synthetic (withstands degreasers and electrical contact cleaners, for industrial equipment).
Fire-retardant vinyl (compliant with UL 94 V-0, for building electrical components).
Auto-detects label end to avoid partial prints (which risk misidentifying critical electrical assets).
Connection & Interference Resistance: Anti-electromagnetic interference (EMI) Bluetooth 5.3 (AES-256 encryption, resistant to noise from motors, HV cables, or industrial controls); Wi-Fi 6 (802.11ax, for sync with cloud-based inspection systems); USB-C (wired backup for EMI-heavy environments). Auto-reconnects within 0.5 seconds if signal drops (avoids data loss during HV inspections).
Software Integration: Integrates with electrical inspection management systems (e.g., Fiix, UpKeep, SAP Asset Intelligence Network) via open APIs. Supports "inspection data auto-population" (pulls equipment ID, last inspection date, and test standards from the system)—eliminates manual data entry errors.
3. Step-by-Step Electrical Inspection Labeling & Safety Protocol
Electrical inspection workflows require strict adherence to safety (e.g., lockout/tagout) and data accuracy—follow these steps:
3.1 Pre-Inspection Preparation
Inspect Printer Condition: Check for cracked housing (compromises dust/oil resistance), loose label rolls, or oil residue on the print head. Test print a sample label and scan its QR code to confirm linkage to the inspection system—ensure test data (e.g., "insulation resistance: 100MΩ") displays correctly.
Charge & Secure Pairing: Fully charge the printer and pack an insulated power bank (for outdoor/HV site use). Pair the printer with the inspection tablet via anti-EMI Bluetooth; enable "auto-lock" after 2 minutes of inactivity (prevents unauthorized access to inspection data).
Load Electrical-Grade Labels: Select labels based on asset type (e.g., heat-resistant for motors, fire-retardant for building circuits). Open the printer cover, insert the roll (thermal side facing print head), thread through the exit slot, and calibrate via the inspection app—test print to ensure adhesive sticks to textured surfaces (e.g., painted metal, plastic enclosures).
3.2 In-Scenario Labeling Flow
Industrial Equipment Patrol Inspection:
Perform lockout/tagout (LOTO) on the equipment to ensure it’s de-energized—verify with a voltage tester.
Scan the equipment’s existing ID tag with the inspection app to pull up its history (e.g., "last inspected: 2024-01-15").
Conduct tests (e.g., insulation resistance, current draw); input results into the app—mark status as "pass" or "fail."
Print the label and apply it to a flat, accessible surface (avoid moving parts or heat sinks); scan the label’s QR code to sync results to the cloud.
HV Power Infrastructure Inspection:
Don appropriate PPE (insulated gloves, arc flash suit); ensure the inspection area is cordoned off.
Use a HV-rated tablet to log asset ID (e.g., "Transformer T-101") and test data (e.g., "oil temperature: 45℃").
Position the printer on an insulated cart (10m from HV components to avoid EMI); print the label with HV warning symbols.
Apply the label to the transformer’s insulated nameplate; take a photo of the labeled asset and attach it to the inspection report.
3.3 Electrical-Specific Safety Rules
Ensure De-Energization: Never print or apply labels to energized electrical equipment—always perform LOTO and verify zero voltage with a calibrated tester. For HV assets, coordinate with the utility company to de-energize the circuit before labeling.
Protect Against EMI: Keep the printer at least 5m away from operating motors, HV cables, or arc welders—EMI can corrupt label data or disrupt Bluetooth connectivity. Use wired USB-C connection in EMI-heavy areas (e.g., factory motor control centers).
Avoid Fire Hazards: Use only fire-retardant labels in enclosed spaces (e.g., electrical closets, breaker boxes). Never leave misprinted labels near ignition sources (e.g., hot motor windings)—dispose of them in a metal waste container.
4. Inspection Label Management & Compliance Tips
Data Linkage for Traceability: Ensure each label’s QR code links to a cloud-based inspection report (including test data, photos, and inspector notes). This enables auditors to quickly verify compliance with standards like IEC 60364 (building wiring) or NFPA 70E (electrical safety in the workplace).
Label Content for Compliance: Include mandatory fields on labels:
Asset identifiers (equipment ID, location, voltage rating).
Inspection details (date, inspector ID, test results, status: "pass/fail").
Safety information (hazard symbols, next inspection date, LOTO reference number).
High-Volume Inspection Efficiency: Use "batch printing" for identical assets (e.g., multiple circuit breakers in a panel). Pre-load asset IDs into the inspection app, then print all labels at once—reduces time spent on repetitive data entry.
Outdoor/Harsh Environment Adaptation: For outdoor power infrastructure (e.g., utility poles), use UV-resistant labels with permanent adhesive. Apply a clear protective overlay (compliant with UL 1950) over the label to prevent fading from sun exposure.
5. Troubleshooting Common Electrical Inspection Issues
Symptom 1: Label QR code won’t scan (industrial setting)
Root Cause: Oil/dust buildup on the code, low print resolution, or EMI disrupting the scanner.
Solution: Wipe the QR code with a lint-free cloth (dampened with isopropyl alcohol for oil); adjust printer settings to 300 DPI; move the scanner 1m away from motors/HV cables to reduce EMI.
Symptom 2: Printer disconnects during HV asset labeling
Root Cause: Strong EMI from HV components (e.g., transformers, switchgear) interfering with Bluetooth.
Solution: Switch to a wired USB-C connection between the printer and tablet; position the printer on an insulated cart at least 10m from HV assets; use an EMI-shielded USB cable.
Symptom 3: Label adhesive fails on hot motor housings
Root Cause: Using standard adhesive labels (not heat-resistant) or applying labels to surfaces >80℃.
Solution: Switch to heat-resistant polyester labels (rated to 150℃); wait for the motor to cool to <50℃ before applying labels—verify surface temperature with an infrared thermometer.
Symptom 4: Inspection data on labels is incorrect
Root Cause: App sync error with the inspection system, manual data entry mistake, or outdated asset ID.
Solution: Re-sync the app with the cloud system to refresh data; double-check test results (e.g., voltage, resistance) before printing; scan the asset’s original ID tag to confirm equipment details.
6. Electrical Inspection Printer Maintenance & Storage
Proper care ensures reliability in harsh electrical environments—focus on durability and data integrity:
Daily Cleaning: Wipe the printer exterior with a lint-free cloth dampened with isopropyl alcohol (removes oil, dust, and electrical contact cleaner residue). Clean the print head daily with a dry, sterile swab—avoid alcohol (can damage heat-resistant coatings on the print head).
Battery Maintenance: Charge the printer to 100% at the end of each inspection shift (use only manufacturer-approved chargers to avoid overheating). For long-term storage (e.g., off-season), charge the battery to 50% and store it in a temperature-controlled cabinet (15–25℃)—away from electrical equipment that emits EMI.
Label Storage: Keep electrical-grade labels in a sealed, moisture-proof container (compliant with UL 94) in the inspection vehicle. Avoid storing labels near solvents (e.g., degreasers) or adhesives—chemical fumes can degrade label material and adhesive.
Quarterly Calibration: Test the printer’s print quality and QR code scannability with a calibration label (provided by the inspection system vendor). Check for worn parts (e.g., paper exit rollers, Bluetooth antenna) and replace them with OEM components—ensures compliance with electrical inspection standards.
Read recommendations:


Building C, Bairongda, Ma'anshan, Bao'an District, Shenzhen City, Guangdong Province
Tel:18823301751
Service Hotline:400-008-8930


 2025-09-02